Showing posts with label Lightroom. Show all posts

Saturday, October 25, 2008

My approach to grade a landscape photo in Lightroon

Here, I am trying to share my typical work flow to deal with color grading landscape photos in Adobe Lightroom 2. (note: my photos is shot in RAW with Canon EOS 450D)


here is my photo. you can see its a overcast day with a lot of clouds and very little contrast.


I bootsted the exposure a little to bring up the sea.


I boosted the vibrance for richer colorful sea.


Now, using the gradient tool in LR 2, i lowered the exposure of the sky as well as boosted its contrast to see better details of clouds. I also turn up the saturation for richer color and even added the blue tint to enhance the blue.


Finally, i crop my photo for the panorama and also notice I try to crop with the rule-of-third in mind.


Some final tweaks boosting contrast and vibrance.

This is just some typical steps I do to most of my landscape photos but the acutual process will differ from photo to photo. I also spend more time to tweak individual color and split-toning ( and sharpening) to achieve the final look.


here's the comparison from start to the end.

Friday, August 22, 2008

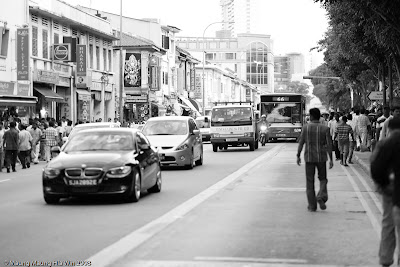
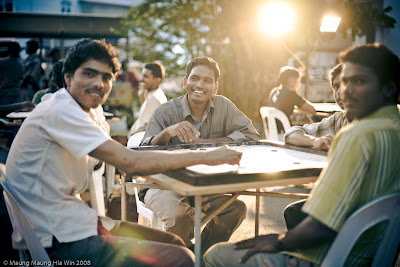
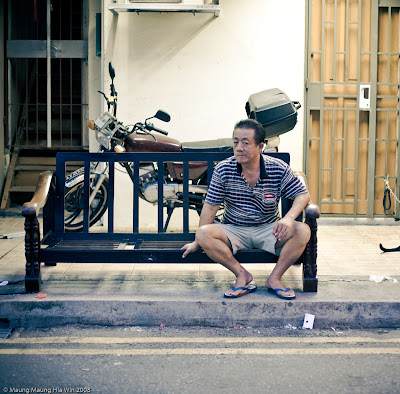
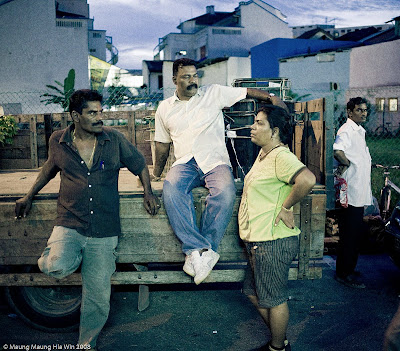
Little India ..a different singapore

I've been experimenting with street photos lately and posted a few in this blog. But I just realized I haven't post my Little India street photos to this blog. (Thanks Gyit Tu for her interest in the street photos).

Street photography seems to me like the hardest and most under-rated photography. You can expect certain shots but you can hardly plan anything. And most of all, you need to be more intrusive/closer to get a good perspective .. and yet find your way out without much troubles in this crowded little island.
I went to Little India on Sunday a few weeks back with my friends Zaw Zaw and Nay Naing to take some street shots. It's a totally different part of Singapore. Different buildings , different shops and different faces roam the streets of Little India on Sunday.

Most Bangladeshis workers come here to hang out, buy things and meet friend in this area on Sundays. And almost all of them don't mind taking pictures of them.. In fact, some even asked me to take their photo even though they knew that they cant get the picture back.

Is it culture related? Metropolitans are more concerned on the privacy I guess.

Well..
Here are some of the photos I take. As usual, some are good , some are average, But I hope as a whole series of pictures, I try to capture the mood and culture of the Little India on Sunday.

You be the judge If i successfully captured it.
(These photos are best viewed in Slide show mode)
click here for the whole series.

P.S. For the gearheads, I brought 4 lens with my EOS 5D. (EF 20-35mm f/3.5-4.5 USM, EF 35mm f/2, EF 50mm f/1.4, EF 100mm f/2.0). Most are shot with 35/2 but I made some interesting shots with both 100/2 and 20-35mm. Night shots are mostly shot at ISO1600 and some are ISO3200 mostly shot wide open as I love the DOF.


Wednesday, June 18, 2008

tropic


tropic, originally uploaded by Maung Maung aka Mexx.

Its at sentosa.. southern most part of the Asia continent..
treated to have Lomo / Cross Processed Look.

Friday, October 26, 2007

Digital Color Grading

This video will show you how a color grading a photo can make the difference..
Most digital photo looks flat and saturated .. so I grade them to look more appealing and film-like.. You will notice why most of your average digital camera wont produce good results..
99% of the grading are done in Lightroom..
I made this as part of my demo reel.


Tuesday, August 14, 2007

Lightroom Presets and Resources

I have developed many photos in Lightroom and i have already tweaked and saved many presets to get me started quickly. With these presets, I can develop a photo into a usable look quickly.. and I can try different look with just hovering over the presets in Develop module..
and then I just have to tweak exposure or some color/hue adjustment to get it done.. I think everyone should make them use them to speed up the processing.
so I am just sharing some lightroom sites and presets I found on the interweb..
The presets may not work out-of-the-box on your photos .. depending on your camera output and the style that you shoot. So it's best used when you adjusted them and customized for your need. But these will give you started quickly.
  1. Lightroom killer tips
  2. Lightroom Color Presets from Inside lightroom
  3. Lightroom Presets from lightroompresets.com
Enjoy..

Friday, August 10, 2007

Color grading , digital work flow and Lightroom

original
Processed in Lightroom, Added border in Photoshop

I think I'll share a little about my digital post processing work flow .
For me, taking photos is just a first step in it. The fun of processing the photos to me is as good as or even better than taking one. I enjoy playing with colors and grading them since I learn Photoshop back in 1996.
Colors can affect the mood of the image and its very important part of an image. If you pay attention to good TV commercials and Hollywood movies, you will notice how they play with colors to portray different mood. From bluesy muted colors of sad, lonely scary scenes to bright , vibrant and contrasty pictures of happy and joyful moments, the Hollywood has already mastered the use of color grading to alter the mood.

original
BW converted in Lightroom

For many high end film/ video post production, there's a process called grading and it went through a "Colorist" using expensive and highly sophisticated hardware/software to grade them.
Generally, people try to start with color correction, to get the right color balance, white point , black point , gamma etc. But they are not hard and fast rules for all cases. Its completely okay to bend them to get what you wanna portray in the picture. Back in the film days, using different film stock can yield different look . Also darkroom can take care of these tasks like dodging , burning .. even using cross processing.

original
Cropped and processed in Lightroom

Now as we move on to digital photography, these tasks has moved into digital realm. And previously I used Photoshop to tweak colors and manipulate my images. But when I got back into photography after I got my first DSLR two months ago, I discovered Adobe Lightroom.

Adobe Lightroom is an amazing program. Its flexible , easy to use and non-destructive. I use it to process all my photos. I shoot all my photo in RAW mode ( think of them as digital negatives) and import them into LR to porcess them all the way I wanted.

original
Cropped and processed in Lightroom

I usually start by adjusting the exposure, white point and black point. And then play with contrast and curve. This will get me a starting point for right exposure.
Then I am starting to playing with cropping to recompose. After that, I'll adjust white balance, hue and vignetting etc to make the image works..

You can see how these images has changed from original RAW image to final outputs. They usually look average to me when it came straight out of camera. Flat contrast, saturated tone etc. One thing to note is that I didn't use any mask or selection based color correction in my photos. All of these results are achieved with adjusting various sliders in Lightroom develop module. Lightroom color adjustment tools are pretty easy and great to use. But I'd like to see sliders to tweak color , hue and brightness in different zones ( like highlight or shadow) in next genereation of Lightroom.


But as color is a subjective matter just like music. So I dont dare to say I am doing the best decision for my photos. Different people like different taste. I am still learning this by posting my photos to Filckr, my blog here and different forums and getting their response.


So, feel free to let me know if these works for you or not.
I'll post more detail processing in Lightroom later..
Cheers..