Showing posts with label Lighting. Show all posts

Wednesday, August 29, 2007

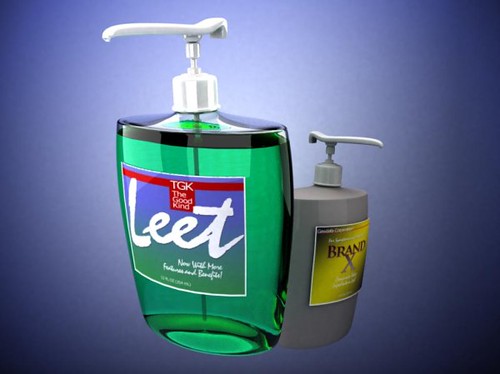
Lighting challenge #11 draft 01

I am pretty bored today at work.. and getting tired of working the same thing for awhile..
So I decided to enter the lighting challenge #11 from CG Talk.

This is my first draft .. I have worked more than one hour into it now.
Rendered straight out from Maya 8.5 + Mental Ray. Using white cards and Final Gathering.
no lights in the scene.

Saturday, August 11, 2007

Lighting in Photography vs Computer Graphics

I am just trying to share some of the computer graphics pictures I have rendered in past a few years. I think by looking at them, you can see why photography is so closely related and why I am interested so much.


This picture is inspired by one of the Absolut Vodka advertisement. I called my vodka Absolut Barnyar ( Barnyar in Myanmar means Blah Blah). It was made more than 1 year ago in Maya and rendered with mental ray using dielectric materials. I was trying to achieve gradient frosted glass look on the bottle.. which I find is really expensive to render. This image took almost 30min to render on my laptop (Centrino 1.6 GHz)

For lighting, you can see I was using digital equivalent of soft boxes placed like that for reflection and soft shadows. Its rendered using final gathering in Mental ray to get color bleeding and such.
Same bottle from another angle and back drop. This image is still not finished. You can see the glass is almost black. The reason is I have not set full ray traced depth to get it transparent. Its expensive to render transparency in CG. That's why I am so happy to do so in Photography.

I did this about a year ago for CG talk lighting challenge entry. Lighting was done via 2 soft area light ( soft box) placed on left and right of the model. The reflection is from a HDR image.

This was done 3 years ago. Using a area light + HDR lighting too.

Lately, I haven't create anything CG at home. Working as a CG artist is enough for me. That's why I am doing more photography lately. I still like CG and creating photorealisitic images in it. But so far, I dont wanna fire up Maya or anything CG at home.

I think I will get tired in Photography if I have to do it for profession too. :P

Friday, August 10, 2007

Color grading , digital work flow and Lightroom

original
Processed in Lightroom, Added border in Photoshop

I think I'll share a little about my digital post processing work flow .
For me, taking photos is just a first step in it. The fun of processing the photos to me is as good as or even better than taking one. I enjoy playing with colors and grading them since I learn Photoshop back in 1996.
Colors can affect the mood of the image and its very important part of an image. If you pay attention to good TV commercials and Hollywood movies, you will notice how they play with colors to portray different mood. From bluesy muted colors of sad, lonely scary scenes to bright , vibrant and contrasty pictures of happy and joyful moments, the Hollywood has already mastered the use of color grading to alter the mood.

original
BW converted in Lightroom

For many high end film/ video post production, there's a process called grading and it went through a "Colorist" using expensive and highly sophisticated hardware/software to grade them.
Generally, people try to start with color correction, to get the right color balance, white point , black point , gamma etc. But they are not hard and fast rules for all cases. Its completely okay to bend them to get what you wanna portray in the picture. Back in the film days, using different film stock can yield different look . Also darkroom can take care of these tasks like dodging , burning .. even using cross processing.

original
Cropped and processed in Lightroom

Now as we move on to digital photography, these tasks has moved into digital realm. And previously I used Photoshop to tweak colors and manipulate my images. But when I got back into photography after I got my first DSLR two months ago, I discovered Adobe Lightroom.

Adobe Lightroom is an amazing program. Its flexible , easy to use and non-destructive. I use it to process all my photos. I shoot all my photo in RAW mode ( think of them as digital negatives) and import them into LR to porcess them all the way I wanted.

original
Cropped and processed in Lightroom

I usually start by adjusting the exposure, white point and black point. And then play with contrast and curve. This will get me a starting point for right exposure.
Then I am starting to playing with cropping to recompose. After that, I'll adjust white balance, hue and vignetting etc to make the image works..

You can see how these images has changed from original RAW image to final outputs. They usually look average to me when it came straight out of camera. Flat contrast, saturated tone etc. One thing to note is that I didn't use any mask or selection based color correction in my photos. All of these results are achieved with adjusting various sliders in Lightroom develop module. Lightroom color adjustment tools are pretty easy and great to use. But I'd like to see sliders to tweak color , hue and brightness in different zones ( like highlight or shadow) in next genereation of Lightroom.


But as color is a subjective matter just like music. So I dont dare to say I am doing the best decision for my photos. Different people like different taste. I am still learning this by posting my photos to Filckr, my blog here and different forums and getting their response.


So, feel free to let me know if these works for you or not.
I'll post more detail processing in Lightroom later..
Cheers..
Quiet

I haven't shot much interesting photos lately. Could be that its harder to find new subject? Could be the shitty week I am having at work? Could be that I am just running out of passion? I dont know.
On the other hand, my flicker gallery has now more than 4,000 views.. also my blog is slowly gaining momentum.. I feel bad that I haven't post a photo or blog post in a few days.. So today I try to find something to shoot.

Here it is.. not a very interesting subject.. A product shoot of my phone .. I was just trying to replicate some of the lighting concepts I learn and used in computer graphics. Using white cards and black cards.

It was shot on a black cloth draped over my chair. The white reflection is the A4 paper I held in my hand above the phone. It was lit by Canon 430ex speedlite firing into it.
Lighting info, Canon 580ex II on camera right 1' above the subject shooting into an A4 envelope on the left. and 430ex further away from camera right shooting in the A4 paper held above by my hand. lighting ratio 2:1 ( 580ex : 430ex) triggered by ST-E2.
my phone was a litle dusty so i did some dust busting in Photoshop afterwards.

This is another closeup shot of my laptop logo in the similar setup.. I was thinking of shooting the whole laptop but the chair was not big enough and I was lazy to move the whole setup to my table. May be tomorrow.

Monday, August 6, 2007

580ex , 430ex, ST-E2 and outdoor shoot

As I mentioned in my previous post, I really wanted to know how 580ex , ST-E2 and infra-red ETTL will work in daylight situation. And I also wanna learn how lighting ratio will help me get nice photos. Lucky me.. Today, my colleague Matt lend me a 580ex to play with and I am a one happy cat.

I just couldnt wait but asked my friend and colleague Pete to pose for me.. We just headed to the car park at the back of the office. I setup my camera in Aperture priority mode. Set my 430ex in Gropu B , ETTL mode. Set 580ex in Group A, ETTL mode too. And then set my ST-E2 to use Lighting ratio 2:1 (more on Group A, 580ex). Lastly, I set my camera exposure compensation to -2 stop to get underexposed background effect like you seen in the pics..


That's it for the settings.. then I placed 580ex on a platfrom 1' above the ground on camera right.. and holding 430ex on my left hand stretched as far as I can ...
Shooting is easy.. all done in less than 15 minute.. no hassle of adjusting flash outputs and apreture to get proper flash exposure.. All handled by ETTL.. and I still have control by using flash exposure compensation and lighting ratio on ST-E2. So.. I am really pleased.. And they worked so well that it even looks like they are photoshopped inside on a blue screen background. It will be better with proper light stand and umbrellas may be..
Except out of 10 or so shots, flash didn't fire on 3. that mean 70% working.. It could be that both flashed are almost 180' on the side and lost line of sight on that occasion. I think it can be avoided with proper placement of flashes.


even though the flash didn't fire.. the silhouette turned out interesting.

Man.. now I am itchy for 580ex.
Thanks to Pete and Matt for making this shoot possible..

Sunday, August 5, 2007

Bike Rider Magazine Shoot

My colleage Jeremy is writing an article for "Bike Riders Magazine" and he need some help taking photos for his article. He's a passionate bike rider and he's writing it for free.. so naturally, the shoot is free. But its an exciting opportunity for me cause I never shot Bikes before and It'll be published in a magazine.

After waiting two weekends for a good weather , we took our chance yesterday under cloudy sky. The shot went pretty well except two things.

First, my cheap Tamron 70-300mm Di LD Macro 's slow focusing challenged me. I used manual exposure mode and servo focus mode to achieve the fast moving looking pics like these.


After that, when I was about to shoot portraits, my optical slave on my SB-24 fails to fire. I was really disappointed. I am actually hoping to get good strobist shots on that shoot.. but well.. I gotta get Cactus V2 radio triggers.. or should I get a 580ex?

With 580Ex and my ST-E2, i can get full wireless E-TTL strobe setup with lighting ratios directly controlable from my camera.. no need to run around and set flash power. Downside? it's infrared based system.. so it need line of sight to work. And of course, its expensive. Even a 2nd hand 580ex mark I will cost $500+.
Cactus V2 seems a decent solution but it'll render my ST-E2 useless and as I said, I have to adjust flash power manually. I don't mind doing that but its a hassle going back and forth between strobes and camera. But I think its the price to pay for being a strobist on the cheap. :)

As you can see.. it'll be nice to have second strobe to use as Fill or back light..

This shot looks okay without the strobes but it'd be better with strobes in my opinion.
Anyway.. more photos in my picassa album.. check it out.. and feel free to leave a comment here or in my shout box of the left.

Saturday, August 4, 2007

Different Flash Diffuser tests for Low Key lighting

I was quite disappointed that I couldn't achieve proper low key lighting with my current setup so I did this little test to figure out how each diffuser is affecting the light quality.

I use all the diffuser I have. omnibounce , inflatable softbox ( about 8" x 6") and lumiquest bouncer.
I also shoot with manual mode without adjusting the aperture to see the light loss from different diffusing method. As usual, I had no choice but to use myself as a guinea pig.
They are all shot inside my room so there's constraints about the camera:flash:subject ratio to control the light diffusing into the back wall. I put myself as far as I can from the wall to minimize the light falling into the background and put the flash as close as I can to me too.

All photos are shot with EOS 30D, Sigma 18-50mm f2.8 EX DC lens at f3.5, 1/180s ISO 200 , focal length 46mm.
Camera is 3' away from subject. White wall behind me 2.5' away. 430ex flash on 1/64 power beside me right 1.3' away.
pardon the focusing.. cos i m too lazy to use remote.

first, unprocessed version .. you can see the light loss from different diffuser by looking at the brightness.

now the lightroom processed version to compensate the exposure / levels..


In my opinion , the inflatable softbox is most useful as it has minimal light loss, less stray light casting on the wall and the soft quality of light on the subject.

Lumiquest bouncer + white trash bag give me the best soft box effect at the cost of light loss.

I think getting a silver umbrella and swivel is the ultimate solution for controlling that kinda lighting.

Anyway.. after that test.. I wanna go try getting the shallow depth of field and low key lighting using strobes .. So I made this self portrait.. Its really hard getting the focus on my eye and the right framing. Not the best composition but this is what I can get.

430ex on my right 1.5' away with inflatable softbox + a layer of white tshirt to even lower the output. flash at 1/64 power triggered with ST-E2.
50mm , f1.4 , 1/80s ISO 100.

cheers..

Tuesday, July 31, 2007

Photoshoot


Last nite, Theo and Jude came over to take some photos for their parents.
Even though I've been playing around with strobes lately, its a really good experience for me. Working with people is something I have to work on. I realized I am not really ready for a real shoot. They are fun and friendly to shoot but the problem is I was hesitant to direct them as they are friends. Another this is I should take more time in setting up strobes and angle but I was somehow rushing the shoot. I should do so for upcoming shoots.

Another problem is the limited working space. We wanted to try getting some low key moody portraits but
1. the room is too small and have light colored walls / ceiling so they are all acting like reflectors.
2. I cant move my strobes closer to them to overcome that problem because I don't have a soft box or umbrella to diffuse the light when I place it close.

Anyway.. here are some of them. I am not totally satisfied but there's lesson to be learn and I will improve on it next time. Cheers.


Wednesday, July 25, 2007

Last rockstar

This is the last of my self humiliating rocker photos .. I croppped the left to get rid of the SB-24 on the tripod..
somehow .. it reminds me of Nirvana's Smell like teen spirits video..


Tuesday, July 24, 2007

Keep on Rockin'

Well.. What can I say.. I am bored, I have some strobes, I have a lens to test, and I have no model to shoot with.
So here I am.. rocking hard..(the only other hobby of mine that I dig) and taking photos of myself.. which I am not really comfortable of..


I shot them in my room so I had to photoshopped out some unwanted stuffs like light switches and table lamps. But the challenge here is lighting. the SB-24 strobe on tripod was cloned out and replaced with fake lens flare in PS.

strobist info, 430ex on my lower left with sto-fen omni bounce 1/4 power triggered with ST-E2 .. from my behind right, SB-24 on tripod with 8"x6"blimp sofbox in 1/2 power triggered optically.

I used eBay radio remote to get the focus and self-timer to get rid of the remote from my hand .. and started rockin' :P .. and shot a few of them.. And this is the one that I liked..

This shot is from the same place, my camera is on my Manfrotto tripod. But the remote is on my right hand where you cant see it. I wanted to experiment with shallow depth-of-field and wide angle effect that the new Sigma 18-50mm f2.8 EX DC can offer.

strobist info, 430ex on my lower left with sto-fen omni bounce 1/4 power triggered with ST-E2 .. from my behind right, SB-24 on tripod with 6"x8" blimp softbox in 1/2 power triggered optically.

Wednesday, June 20, 2007

Me, a great friend called Brad and the amazing EOS 5D

Today, my colleague Brad came over with his camera and lens to have a look at my strobe setup.Ended up being the model for some portrait shoots. Oh boy! I love his EOS 5D. But its quite a beast compare to my 400D and I am not sure if I'll be carrying that camera with me all the time.May be I'm just telling myself that EOS 5D is sour grape.. Haha.Here are the results..


Shoot info, 430ex bounced from left 1/2 power, and Starblitz 250 through plastic bag triggered opticaly on the right.
Shot with brad's camera and lens.. EF 100mm f2.8 macro and EOS 5D
Posted by Picasa

Monday, June 18, 2007